Plumbers putty and silicone putty are two essential tools that aid in the maintenance and repair of various plumbing systems. Each of these substances has unique features that make them an indispensable part of a plumber’s toolkit.
Maricopa, AZ AC Repair Services
It’s comprised of powdered clay and oils and has several benefits.
- Waterproof seal:
- Easy to manipulate:
- Non-hardening feature:Unlike other sealants, plumbers putty does not harden over time.
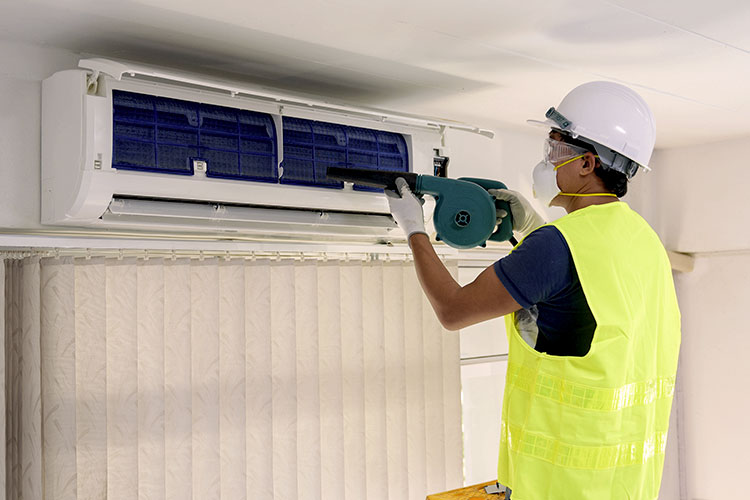
Air Conditioning Repair Services in Maricopa, AZ
Silicone putty has several advantages as well.
- High-temperature tolerance:
- Flexibility:
- Quick curing time:Silicone putty cures more quickly than most other types of sealants, allowing for a quicker completion of the job.
Exploring HVAC in Maricopa, AZ
Each type of putty has its specific applications in the field of plumbing.
- Plumbers putty:It’s primarily used to seal drains in sinks and tubs. It can be used to seal the area between a sink’s surface and the drain assembly, preventing water from seeping into the area underneath.
- Silicone putty:These applications include sealing around heat-generating appliances like water heaters or sealing connections in high-pressure water systems.
Both plumbers putty and silicone putty are undeniably important in the world of plumbing. Their different features and applications make them versatile tools in handling various plumbing issues. Understanding their benefits and proper uses will help you make the most of these essential plumbing tools.
A leaky ball faucet can be quite bothersome, leading to constant dripping, water wastage, and an increased water bill. This issue, however, can be addressed with the right tools and some practical knowledge. Here’s a comprehensive guide to help you fix a leaky ball faucet efficiently.
Understanding AC Repair in Maricopa, AZ
The handle maneuvers a ball-shaped cap that sits atop cylindrical body and controls the water flow and temperature.
Essential Air Conditioning in Maricopa, AZ
The repair of a ball faucet requires some specific tools.
- Adjustable wrench
- Screwdriver (Philips and flat)
- Replacement parts (if needed)
- Plumber’s grease
Choosing the Best Air Conditioning Companies in Maricopa, AZ
Follow these steps to repair a leaky ball faucet:
- Turn off the water supply:
- Remove the handle of the faucet:
- Remove the cap and collar:Use an adjustable wrench to loosen and remove them.
- Remove the faucet cam:You’ll find a small, round component called the faucet cam. Remove it to expose the ball and two rubber seals.
- Remove and replace the seals:The seals are usually the cause of the leak. Remove them with a screwdriver. If they’re damaged, replace them with new ones. Apply a small amount of plumber’s grease to the new seals before installation.
- Reassemble the faucet:
Helpful Tips
- Take a picture of the faucet at each stage of disassembly to help with reassembly.
- Avoid using excessive force when removing or installing components to prevent damage.
By following these steps, you should be able to fix a leaky ball faucet in no time. However, if the problem persists, it might be best to call a professional plumber.
We often come across different DIY hacks for home maintenance issues. However, it’s essential to understand the implications of this practice before incorporating it into regular use.
Understanding AC Installation in Maricopa, AZ
When combined with boiling water, it’s supposed to cut through the sludge and grease build-up in pipes, thus clearing the blockage.
- Pour half a cup of table salt into the drain.
- Follow it up with boiling water.
- Let it sit for a few minutes.
- Run cold water to clear the drain.
HVAC Repair Services in Maricopa, AZ
Despite its popularity, this method has certain implications.
- Temporary Solution:Salt can only dislodge minor clogs. For severe blockages, professional intervention may be required.
- Pipe Corrosion:Regular use of salt can corrode the metal pipes. Corrosion might lead to leaks or, worse, pipe failure.
- Environmental Concerns:High salt concentrations can affect water treatment procedures and harm aquatic life when the salty water ultimately drains into local bodies of water.
Choosing Among AC Companies in Maricopa, AZ
Before you pour salt down your drain, consider the points given below:
- Type of Pipe:Plastic pipes are resistant to corrosion, making them safe for this method. However, metal pipes are prone to corrosion.
- Severity of Clog:Assess the severity of the clog. If it’s a minor clog, simple remedies like plunging or a plumber’s snake can be more effective.
- Frequency of Use:Repeatedly using salt can lead to pipe damage over time.
Your Go-To for Maricopa, AZ Air Conditioning Repair
If you’re not comfortable using salt, there are plenty of alternatives available.
- Baking Soda and Vinegar:Pour half a cup of baking soda into the drain, followed by half a cup of vinegar. Wait 15-20 minutes, then rinse with hot water.
- Plunger:For minor clogs, a plunger can be very effective.
- Plumber’s Snake:
In summary, while salt appears to be useful for minor clogs, it’s crucial to understand the implications and consider alternatives. For severe clogs or recurring drainage issues, always consult a professional.
Flickering lights are a common issue in many households and commercial buildings. Although they might seem like a minor inconvenience, frequent and unexplained flickering can indicate underlying electrical problems that require immediate attention.
Top HVAC Companies in Maricopa, AZ
Here are some potential causes of flickering lights:
- Loose Bulbs:If the bulb isn’t fully tightened in its socket, it can cause inconsistent lighting.
- Voltage Fluctuations:Sometimes, the voltage supply to your building can fluctuate, which in turn can cause lights to flicker. This can occur if you’re using heavy appliances that consume a lot of power.
- Faulty Light Switches:A faulty light switch can also be the reason behind the flickering lights. If the switch isn’t properly connecting with the bulb, it can cause the bulb to flicker.
- Issues with the Electric Meter Box:If the connections in your electric meter box are loose or corroded, they can cause fluctuation in the electric supply, leading to flickering lights.
- Aging Wiring System:Older properties with outdated wiring systems are more likely to experience flickering lights. Aging or defective wiring can lead to inconsistent light output.
Effective Ways to Respond to Flickering Lights
Here are some actions you can take if you’re dealing with flickering lights:
- Check and Tighten the Bulb:
- Inspect the Light Switch:If the bulb isn’t the issue, inspect the light switch. Try turning the switch on and off multiple times.
- Test the Appliance Load:Try turning off heavy appliances to see if it stops the flickering. If it does, the issue could be a fluctuating voltage supply due to heavy power consumption.
- Consult an Electrician:If the above steps don’t resolve the issue, it’s time to consult a professional. An electrician can inspect your electrical system, identify the cause of the flickering lights, and suggest the appropriate repairs or replacements.
In a nutshell, while a flickering light can be a minor annoyance, it can also be a sign of serious underlying electrical issues. It’s essential to identify the cause and address it promptly to prevent potential hazards. Simple fixes such as tightening the bulb or replacing the light switch might solve the problem.
Understanding electrical concepts can often seem daunting, especially when it comes to the intricate nature of wiring systems. Among these, the differences and applications of line and load wires stand as a crucial aspect. This article takes a detailed look into these differences and how both types of wires serve unique functions in an electrical system.
What are Line and Load Wires?
Before delving into the differences, it’s essential to establish what these two types of wires represent.
- Line Wire
- Load WireLoad wires are often white or grey.
Differences between Line and Load Wires
There are several ways in which line and load wires differ, and these differences are critical for the safe and effective operation of electrical systems.
- Direction of CurrentLine wires bring power into a device or circuit, while load wires carry it away.
- Color Coding: To distinguish between line and load wires, electricians often use color-coding. Line wires are typically black or red, while load wires are white or grey.
- Safety Considerations: Line wires, due to their function of delivering electrical current, carry a potential risk of electrical shock if mishandled. On the other hand, load wires, being the return path, are generally safer to touch, although mishandling should still be avoided.
Applications of Line and Load Wires
Line and load wires have distinct applications in all types of electrical systems.
- Electrical Outlets: Line and load wires are used in all standard electrical outlets. The line wire delivers power from the circuit breaker to the outlet, while the load wire returns the unused current.
- Light Switches: In light switches, the line wire brings power from the circuit breaker to the switch, and the load wire carries the current from the switch to the light fixture.
- Circuit Breakers: Circuit breakers also use line and load wires. The line wire brings electrical current into the circuit breaker, and the load wire carries it from the breaker to all the devices or outlets on that circuit.
Understanding the differences and applications of line and load wires can be a game-changer when it comes to basic electrical troubleshooting or even doing simple installations. However, it’s always recommended to consult a professional electrician for any electrical work to ensure safety and adherence to local electrical codes.
- Understanding AC Repair in Maricopa, AZ and Potential Threats to Your Air Conditioner
- Scheduling AC Repair in Maricopa, AZ for Optimal Efficiency
- Understanding the Importance of AC Repair in Maricopa, AZ
- Understanding When AC Repair in Maricopa, AZ Becomes an Urgent Matter
- The Importance of AC Repair in Maricopa, AZ for Enhanced Efficiency and Performance